Showing posts with label Guides. Show all posts

Thursday, May 28, 2009

How I Make the Comics 7: Story

How I come up with the story? Uhhh.... out of nowhere, really.

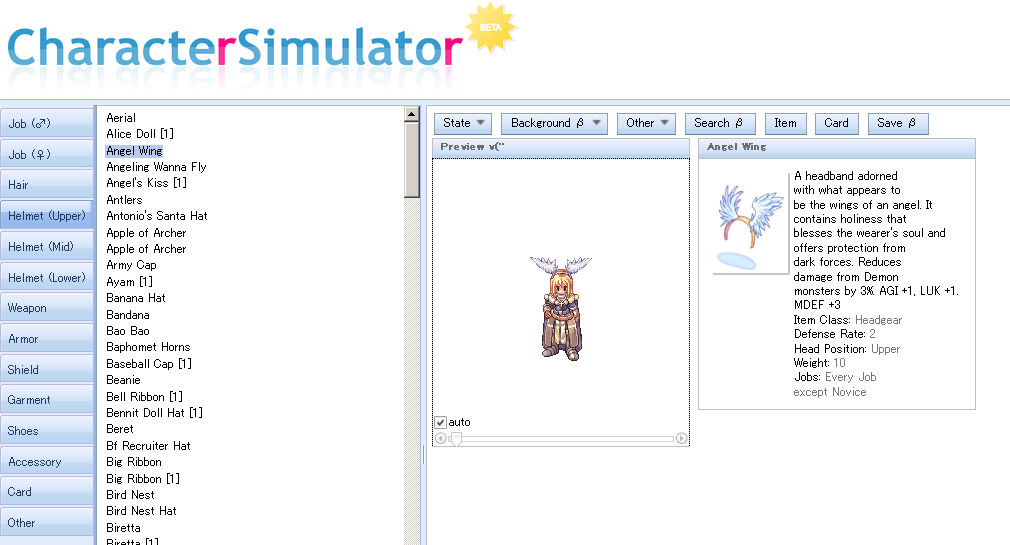
The comic started off as a short fan-fiction. That should be believable enough, what with all the walls-o-text I've been throwing at you all, heh. But, terminally shy as I am, I decided not to post those fanfictions. And, after finding RO sprites online, I figured I could make the story a comic.

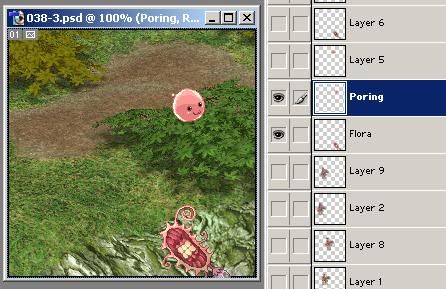
The very first comic was just Kethios playing with porings. I honestly wasn't even sure I'd make more comics after that!

It's really hard to remember where ideas came from. It was almost 5 (many, we started in 2005) years ago when I came up with the original stuff.

Well, let's see. Ideas must have started coming to me while playing RO. My very first character was Benedict Solor on iRO Loki. I thought it would be really cool to have a first AND last name for my character, hahah. I knew I'd be an acolyte since they looked cute. The last name came from an online translator. I put in "support" and translated it into other languages until I came up with something that sounded cool. I could go on forever about the origins of my character names, but it'd be way too long. Maybe another day!


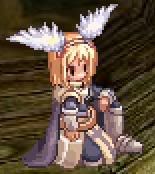
My first RO character, Bene... lol. Not any different in the comic. He became a priest when I made him on oRO.

Playing as the characters helped me grow attached to them. Bene's pet on iRO was indeed Fwuffles, by the way :)

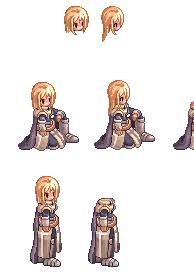
Kethios was my battlepriest. He -did- get to priest in-game, but battlepriests are hard to play, so I didn't use him much. Also, everyone loved Bene since he was full support. In the comic I made Kethios bad with magic because he had 1 int in-game.

But, that doesn't explain my female characters. I have no clue where they came from, honestly. I can probably point out some inspirations, though: Vesper Holly from Lloyd Alexander's adventure series. She was smart, courageous, pretty... I was so pissed when the author had her get married and pregnant in the end of the story. Sigh. Strong, independent women are a no-no. Ack, I'm ranting.

Anyway, the question was on story. I basically think up one chapter at a time. I have a general idea of where I'm going with the chapter, and then come up with the comics on the spot to get to the end.

The underlying goal for prologue was Ellsy chooses a job.
Interlude - no goal, just having fun
Chap one - Carl gonna leave
Chap two - d-d-d-drama, which is why it took so long for me to get motivated for it

I almost -never- write things by hand (I did in the -way- beginning, but not anymore). For the most part the comic is not scripted at all. Sometimes I write notes to myself in a small text file, but I usually ignore it in the end. Maybe I'll post up chapter 2's text file when it's over in a few months. It's so worthlessly vague.

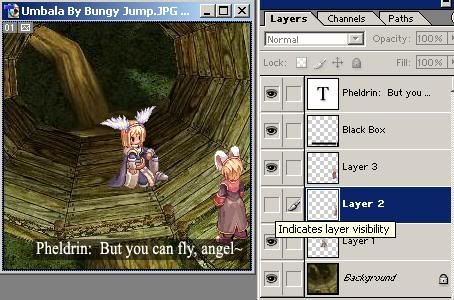
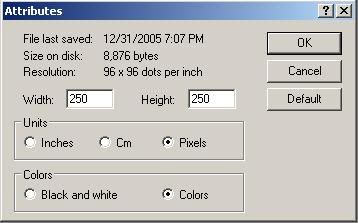
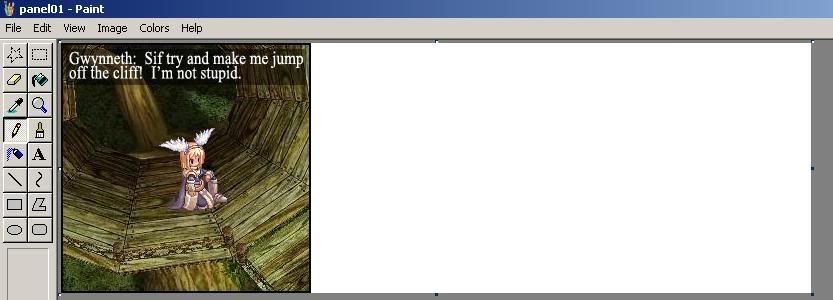
I actually do write stuff, but only in the form of dialogue. I don't write it panel by panel. I write the dialogue first, then try to fit it all into the comic as I'm making it. Often I have to reword the dialogue or cut out sentences for shorten it to make it all fit in an acceptable amount. If you are making a comic, I suggest using larger panel size than my 250x250.

Ideas for characters and stories come to me randomly. Like, in chapter one, I knew Carl was going to leave in the end, but I wanted to show him and Bene and Ellsy having fun before he leaves. And that's where the Golden Thiefbug story came into play. I also vaguely remember discussing GTB with someone, about how he's listed as passive on databases. Like, hey, wouldn't it be funny if they ran into it and it didn't attack? Tada. A nice storyline.

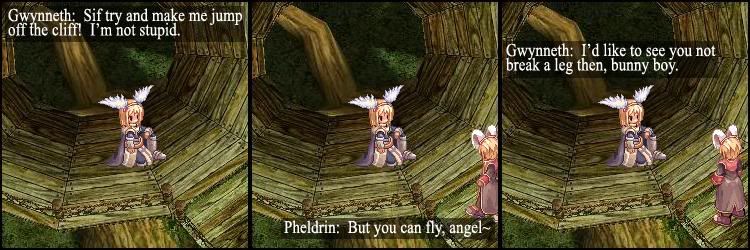
Sometimes I come up with stories in the middle of the night. (This is probably why I never get good sleep and am tired all the time --- I keep wanting to think while it's peaceful). Edgar and Lavian came from that, I think, as well as some characters we haven't met yet (Lily, Gwynneth).

Also I randomly come up with ideas for jokes and stuff when people talk to me on MSN Skype. This is happens with the holiday comics, at least.

I do keep my storylines in my head, though I've made some rather vague outlines in an attempt to get the timeline of events correct, and written dialogue for chapters that have yet to see the light of day.

By the way, due to all of these random inspirations, I have storyline already set up for a loooooong time. I don't need any more ideas! I just need time to make comics with the ideas I have.

HOWEVER, I really don't have an ending to the story. I, uh, hope it'll just come to me when/if we get there!

Also, something interesting to note is that I do not make comics on the spot. I tend to take a weekend and make many comics. In fact, I like to have a very large buffer of comics ahead of what the current comic is. 50 comics is my goal. That way, I can tweak the comics to come if I get new ideas for a dialogue or event. The Baphomet scenes in chapter four, for example, were very lame originally until I talked with a friend and became inspired to remake them into what they are now. It's a good thing the comics were made so far ahead of time that i had the time to fix them!

Well, that's all I can think of to say. if you have more questions on this, go ahead and ask!

How I Make the Comics 6: Tips and Tricks

Part 5 --- Part 7

Here are some Photoshop tips and tricks to help you out.

Layer Merging

Do you have too many layers and want to combine some into one?
Make sure the layers you want to merge are located next to each other in the layer window.
Example: I want to merge Poring and Flora layers.


Select the top layer (Poring). Then press Ctrl + e. The top layer merges into the bottom layer. And that's it!

Layer Organization

Do you have so many layers that you're getting confused? One way to help organize them is to change their color in the layer window.

Simply right-click the layer and choose "Layer Properties".


Choose a color! You can also edit the layer's name at the same time.


It's colored.


I tend to have a specific color for each character. Like, all Ellsy layers are Blue, Carl layers Orange, Benedict layers Yellow... Yes, I organize based on hair color.

Duplicating Layers

This is simple! Just right-click the layer and choose Duplicate.

The new layer will be called "Copy of Layer 5" or whatever and will be placed spatially above the original layer.

Adding a Border/Outline (stroke)

If you ever want to put an outline around things, here's how.

Right-click the layer and go to "Blending Properties".


You could really have a field day with all these options! I haven't even use 10% of them yet.
Choose Stroke.
Move the box so you can see your panel. You're given a preview of what the stroke will do.

Moving the "Size" scroller will affect how big the bleeding is. You can also type in how many pixels in the box next to it.
Clicking the box next to "Color" will open up a palette box for you to use.
"Position" affects which edge the outline will go on. The outside edge of the sprite, the inside edge, or in between.
And much, much more that I won't go into.

Lens Flare

Think lens flares are cool? A lot of people do (just don't overdo it!). They're easy to do.

First, make a copy of your background layer! You don't want to eff up your original background. (See Duplicating Layers above).

On the top navigation bar, go to "Filters" -> "Render" -> "Lens Flare..."


And just mess with the options until the preview looks cool.


That's it!

Lighting Effects

When a Lens Flare doesn't cut it, try out Lighting Effects! It's right under Lens Flare..." in the Filters menu.

This one has way more options than Lens Flare.

I usually put the "Light Type" as "Omni" and just mess with things until it looks good to me.

Next: Where does story come from?

How I Make the Comics 5: Putting Panels Together

Part 4 --- Part 6

Continuing straight from the last part, open up your first panel. It'll open in a new window. You can move it next to your work-in-progress to use as a reference.


To make your second panel, simply edit the "work-in-progress" panel with all the layers. You can select the text layer and change the words, add another character to the picture, change the pose of the character that's already there, delete the character that's there... all in the same file.

Look, I've changed the location of the text and what the text is saying (and I've added another character).


But even if I use the Move tool to move the "Black Box" it will not fit the new size of the text.
You can simply clear it, hide it, delete it, or reuse it.

There we go! A basic panel one and panel two has been made now!


Now for a third one. I've decided I don't want Pheldrin standing that way. He's walked on-screen, so he should be in a standing pose now, right?
Let's paste his new pose in, edit it, and place him over where he was standing in panel 2. Look at him, he's on top of himself.


See that little eyeball thing that I've marked in red there? That tells you that the layer (Pheldrin's walking pose from panel 2) is "visible." If you click it, that layer becomes "invisible."


Now that I've made the old layer invisible, he's no longer on top of himself. Also, if you save it now, Photoshop will keep the invisible layers invisible; the final product will not show both Pheldrins at once.

Although, you could also accomplish this effect by right-clicking the problem Layer and selecting Delete.

It's bad practice to do this, though, in case you'll need that other sprite again.

All right, I'm done with all three panels.


But... now I have three separate panels. How to stick them together to make one complete comic?

Time to go back to MSPaint!

Open panel one.

Now, do you remember what sizes of panels you've decided to use? Remember, I chose 250x250 pixels. What matters right now is the width of the panels. You want to know how much room you'll need for all three panels. For me, that would be 750 pixels.

Go to Image -> Attributes.


And put in your total width for the width section!


Should result in extra white space:


Now open another Paint and open panel02. Go to Edit -> Select all and then Edit -> Copy. Go back to panel one and past it in. Drag it into the second panel postion. Do the same with panel03 and there ya go.


Save it as a .png!

Keep going for some more Photoshop tips and tricks!

How I Make the Comics 4: Text

Part 3 --- Part 5

So, of course, you want your characters to talk.

If you've only got MSPaint, I can't help. Just make a speech bubble or something. But if you've got any program that has layers and opacity settings, you can make the RO-like black transparent box behind the text, just like I do.

I use Photoshop 7.0 so the guide is based on that.

Font Options

First, choose what color you want the text to be. I use white. On the left toolbar, you should see this:

The top box is white. It's your foreground color; that means that's the color your text will be when you type. The 2nd box is background color. It's not that important. See the little arrows pointing to the boxes? If you click it, it switches the colors for you (i.e. foreground color becomes background color).

Now, select the text tool.


Use the top toolbar to choose your font and its settings. Whatever font you choose, I suggest you set its "a,a" to "Strong." It makes the words thicker and much more readable.

Note: Not all fonts have this setting.
I use Times New Roman because I'm boring.

Click anywhere on your background and begin typing.
If you find that the size of the text is too big, you can highlight what you've typed and then select a different size and it will change it all.
If your text looks squished, you can mess with the spacing between letters and lines by clicking the clipboard button on the left of the font options to open up more options.


What if you want Italic text? Or Bold? Or even Bold and Italic? Select the "Roman" box and it will pulldown those options.
Note: some fonts do not have bold or italic options.


Your text WILL run off the screen. Photoshop does not word-wrap for you. You'll have to manually enter line breaks by pressing enter before it goes off the page.

You can also use the "Move" tool to move the text to make more room.


The transparent black box

First, make sure your text is where you want it to be, spelled correctly, etc.
Make sure the Text Layer is on top of all your other layers (this way characters don't get in the way of the text). You can do this by selecting the text layer in the layer box and dragging it upward in the layer box. The other layers (if you have many) will be pushed below it.
This is my Text Layer; notice it is spatially above "Layer 1" (which is my character's Layer).


On Photoshop's top menu, select Layer, go to "New" and select "Layer..."


You can name layers. Click this new layer's name to rename it. I named it Black Box.
Now, click and drag the Black Box layer so that it is right -below- the text layer and -above- the character layer.


Now, select the magnifier. Right click the canvas and select "Fit on Screen." It will zoom up your image.

Select the "Regtangular Marquee Tool." It's just a fancy name for the box tool from MSPaint. Use it to draw a box around your text, like so:


Now, right click on the "Gradient" tool and select the paintbucket, which, amazingly, acts like the paintbucket from MSPaint!


Make your foreground color black. Make sure you have the "Black Box" Layer selected and not the "Text" Layer. Use the paintbucket tool and fill in your box black.

Easy enough, eh? But you're not done yet --- it's not transparent! So, note the "opacity" setting in your layer box. It says 100%.


Click it and change it to 50~80% and you're done!
NB: I used to use 50% opacity, but now I use 80%. I feel that the text is easier to read this way.

Yay, you've completed a panel of your comic! Use "Save as..." to save it. Name it something obvious like "Panel01"
Save it as a .png !!

Now you want to make your second panel, right? Stop, don't close out of anything yet!
One awesome thing about Photoshop is, if you save your picture as a .PSD, it will save all of the layers and everything for you. So, if you've misspelled something, all you have to do it open the .PSD and fix it, then save the panel as a png again.
This is also useful to save your progress in case of power outs, crashes, or other interruptions.
I recommend making a .PSD for each comic you make.

Now to put it all together!

Wednesday, May 27, 2009

How I Make the Comics 3: Assembly

Part 2 --- Part 4

So you've got a background and a sprite. Time to put the character into the background!

First, the MSPaint way.

Assembled in Paint
Open up your background in MSPaint. Here's my background.


Open up your character sheet. Here's mine.

(click to open)

Box the sprite you want, copy it, and, with the background open, paste her where you want her to be.
Make sure you have this transparency option selected!


And that's it.


Now, when saving, you'll want to use "SAVE AS...," not "Save," or else your background will get overwritten, and then you can't use it anymore.


If something like this happens, you've messed up!

You'll have to remake the character's spritesheet. You saved it as a .gif or .jpg. I told you to save it as a .png for a reason!

What if you want to move her again?
Well, too bad. This is MSPaint you're using. Once you've put something in, it's stuck there. You can only undo the last three changes (more on Win 7) you've made, so you'd better pray moving her there was the last thing you did. This is why I use Photoshop to assemble the comic in.

Assembly in Photoshop

Open Photoshop and open your background file. Then open your character's sheet.
Box the sprite you want to use and drag it onto your background.


Hmm, how to get rid of that white background?
Select the Magic Wand tool.


Make sure these settings are set:

Note: You can uncheck contiguous as long as the sprite has no white pixels. It will select ALL white pixels then, so the "locked" in pixels will be selected too)

Select the white surrounding the character.
Then press the "Del" or "Delete" key on your keyboard to clear it.

Zoom in on her using the magnifier tool. Look, she has some white spots locked in her.


Use the Magic Wand to select them, then delete them.


We're done with the wand tool. Right-click the screen and choose "Deselect".


To zoom back out, select the magnifier tool, and right-click anywhere, then select "Actual Pixels".


You can move her again by using the "Move Tool".


If she's not moving, that's because you don't have her layer selected. On the right you should see the Layers area.

If you need to do anything to her, you'll have to click her layer first.

Layers make Photoshop superior to MSPaint. If, later on, I want to move her again, or flip the way she's facing, all I have to do is select her layer and then move her or flip her.
If I'd used MSPaint, I'd have to start the panel ALL over again.

Next, we'll add some text!

How I Make the Comics 2: Sprites

Part 1 --- Part 3

If you're making a sprite comic, you'll of course need sprites. What are sprites?
They refer to the 2d images of characters and monsters etc.
They are readily available in sheet form. Some games' sheets are complete, but for Ragnarok Online, the characters are missing their heads (since the characters can have different hairstyles).

You can get sprites for many games (not Ragnarok Online) here.
For Ragnarok Online sprites, I keep my backups here.

I'll be assuming that you're making a Ragnarok Online character... and that you have some idea how to use MSPaint now.

The Easy Way

Yes, there is an easy way and a 'hard' way to do this. The easy way is this: go to any RO character simulator (I used http://nozomi.arege.jp/ro/index.en.html).

Make the character and then press the "Print Screen" button on your keyboard. Mine is on the top row, next to all the F-keys. It may say "Prt Scrn" or something instead.

Open MSPaint and Paste.
Here is the character I made.


Box your character and copy. Open up a second MSPaint and paste her there.

The nozomi is really cool in that when you click around the character, she'll turn to face that direction. From this, you can easily make your own spritesheet for your character. Here's the one I made.


The sim also has sitting, casting, walking, attacking, dead etc. poses. With a sim, you might not have to use a sprite sheet at all.

Make sure you SAVE the sheet as a .png or .bmp!


The 'Hard' Way

The hard way would be building up a character using spritesheets. Considering how the sim pretty much does everything for you, this method is nearly obsolete, but I'll show how anyway. You may still learn some MSPaint tricks!
Parts:
Body
Head
Headgear

Use MSPaint to open up the class/body sheet. Put a box around the pose you want to use. I'm using this one.


Copy. Now, open up a new MSPaint and paste it into there.


That brown is hideous. Just fill it in with white using the Paint Bucket. Make sure to zoom in and get all the brown bits on her!

What if I want her facing the opposite direction? Changing the direction is actually quite easy.
Simply box her again. Then, go to Image -> Flip/Rotate and select "Flip Horizontal".
(Win 7: box her, then click "Rotate" and select "Flip Horizontal".

Now, make a copy of this body and paste it next to her. It's always good to have extra copies.


Now she needs a head! Go to your head sheet and pick out the head.
Copy and paste the head onto the same canvas her body is on.
You'll have to paintbucket the background white for the head, most likely, and perhaps change the direction the head is facing as well.


Now to put the head on the body. Box the head and Copy it. Make sure this transparency setting is selected:
(Win 7: click the arrow under select and choose "Transparent Selection")


Paste and then move the copy onto her head, where you feel it looks good.


What if I decide I want her head to look in a different direction? That's why I made a 2nd copy of her body. Just put a different head on it. Heck, you could make another copy of the body now again, just in case you want to put yet another head on her.


Whay am I keeping the heads floating up there? Well, what if I wanted to make her standing up instead? I would simply copy in her standing pose, color its background white (you know the drill now). And hey, I've conveniently already got her head floating up there. So simply copy her head onto her new standing pose.


Oh, but what if she needs a headgear?
Open the headgear sheet and, well, you should know what to do by now.

If she will -always- be using that headgear, I suggest putting it onto the base head sprites, too.

What if, later, I find out I want her to turn around, face the opposite way?
Simply box the pose you want to flip, and go to Image -> Flip/Rotate and "Flip Horizontal." That's all there is to it!

Save your character as a .png image. You will NOT be able to continue to the next step if it is saved as a .gif or .jpg!

And that's it. All of my characters have their very own spritesheet. Here's Ellsy's old novice sheet as a bonus!


Next, we'll put the sprite into a background!