
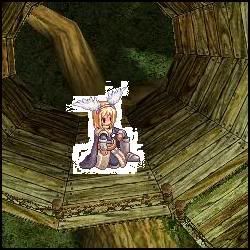
So you've got a background and a sprite. Time to put the character into the background!
First, the MSPaint way.
Assembled in Paint
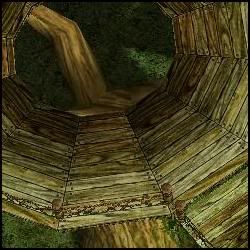
Open up your background in MSPaint. Here's my background.
Open up your character sheet. Here's mine.

(click to open)
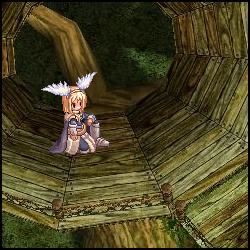
Box the sprite you want, copy it, and, with the background open, paste her where you want her to be.
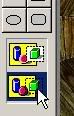
Make sure you have this transparency option selected!
And that's it.
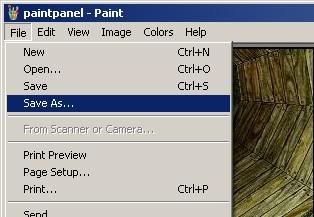
Now, when saving, you'll want to use "SAVE AS...," not "Save," or else your background will get overwritten, and then you can't use it anymore.
If something like this happens, you've messed up!
You'll have to remake the character's spritesheet. You saved it as a .gif or .jpg. I told you to save it as a .png for a reason!
What if you want to move her again?
Well, too bad. This is MSPaint you're using. Once you've put something in, it's stuck there. You can only undo the last three changes (more on Win 7) you've made, so you'd better pray moving her there was the last thing you did. This is why I use Photoshop to assemble the comic in.
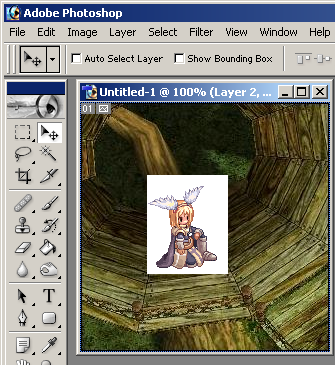
Assembly in Photoshop
Open Photoshop and open your background file. Then open your character's sheet.
Box the sprite you want to use and drag it onto your background.
Hmm, how to get rid of that white background?
Select the Magic Wand tool.

Make sure these settings are set:

Note: You can uncheck contiguous as long as the sprite has no white pixels. It will select ALL white pixels then, so the "locked" in pixels will be selected too)
Select the white surrounding the character.
Then press the "Del" or "Delete" key on your keyboard to clear it.
Zoom in on her using the magnifier tool. Look, she has some white spots locked in her.
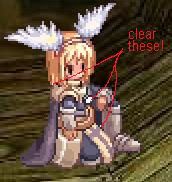
Use the Magic Wand to select them, then delete them.
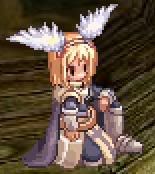
We're done with the wand tool. Right-click the screen and choose "Deselect".
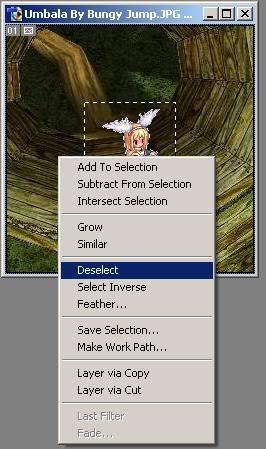
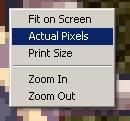
To zoom back out, select the magnifier tool, and right-click anywhere, then select "Actual Pixels".
You can move her again by using the "Move Tool".

If she's not moving, that's because you don't have her layer selected. On the right you should see the Layers area.
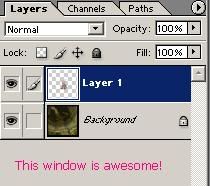
If you need to do anything to her, you'll have to click her layer first.
Layers make Photoshop superior to MSPaint. If, later on, I want to move her again, or flip the way she's facing, all I have to do is select her layer and then move her or flip her.
If I'd used MSPaint, I'd have to start the panel ALL over again.
Next, we'll add some text!
I guess that concludes the actual assembly of the comic, right? Very nice tutorial, I'm using Paint.NET myself as it's free and has all the fancy stull like layers aswell.
ReplyDeleteI was wondering about the nontechnical development of your comic though. How do you make up the story? Do you have everything planned to a certain point or do you make the continuation up after each comic? Is it all in your head or do you have some kind of storybook?
Ah sorry for all the questions, I don't want to keep you from making new comics. XD Can't wait for tomorrow!
I'll make an extra post on story just for you.
ReplyDelete